Sunday, 17 January 2016

Fzr 600 Update

Fitted both the belly pan and seat unit, which involved lots of messing around with bits of cardboard and drilling countless holes. Pretty pleased with the belly pan fit, not so much with the seat, but it'll do. I am just waiting for some grommets and screws to fit the tank cover and then I can get it all painted (going for white again) and I've ordered some great tuning fork stickers for the tank so hopefully it will look good!

Monday, 11 January 2016

Technical Update

I have been a bit ill lately so difficult to move things forward. Busy checking stuff on the RG engine plus building brackets to fit the FZR seat and belly pan.

Thursday, 17 December 2015

Update RG500 and other bits

Well, I have decided to repair the RG, so I have sent the cylinder off to PJ Motorcycle Engineers in Wolverhampton UK, they make their own cylinder sleeves, and will provide me with a piston and hopefully machine the inside of the piston to fit the RG500 small ends and thrust washers ~22.3 mms.

I was hoping to get this done locally, but these guys were cheaper, and the local contact offered to meet me in a carpark to do business, so I wasn't filled with confidence about that, so I preferred doing business with a company with a good website - funny world isn't it!

I haven't decided what to do with the crank yet, the neighbour is an engineer so I am going to ask his advice on the bearings - I think they are OK.

In the meantime, ordered a new disk from Maranello with some rivets, Franco reckons I must have vibration issues causing my engine woes. The French RG forum think it was a bad batch of thrust washers (seriously) and some guy is sending me some old ones - this kinda rings a bell, because if I remember correctly Laurent lost one when I gave them to him, and therefore I replaced that with a new one, - it could have been that one which exploded the first time around and then the replacement exploding the second time around.... although I am kind of doubtful. Franco didn't think it was the clearance as there was not sign of heating or blueing on the remaining part of the thrust washer.

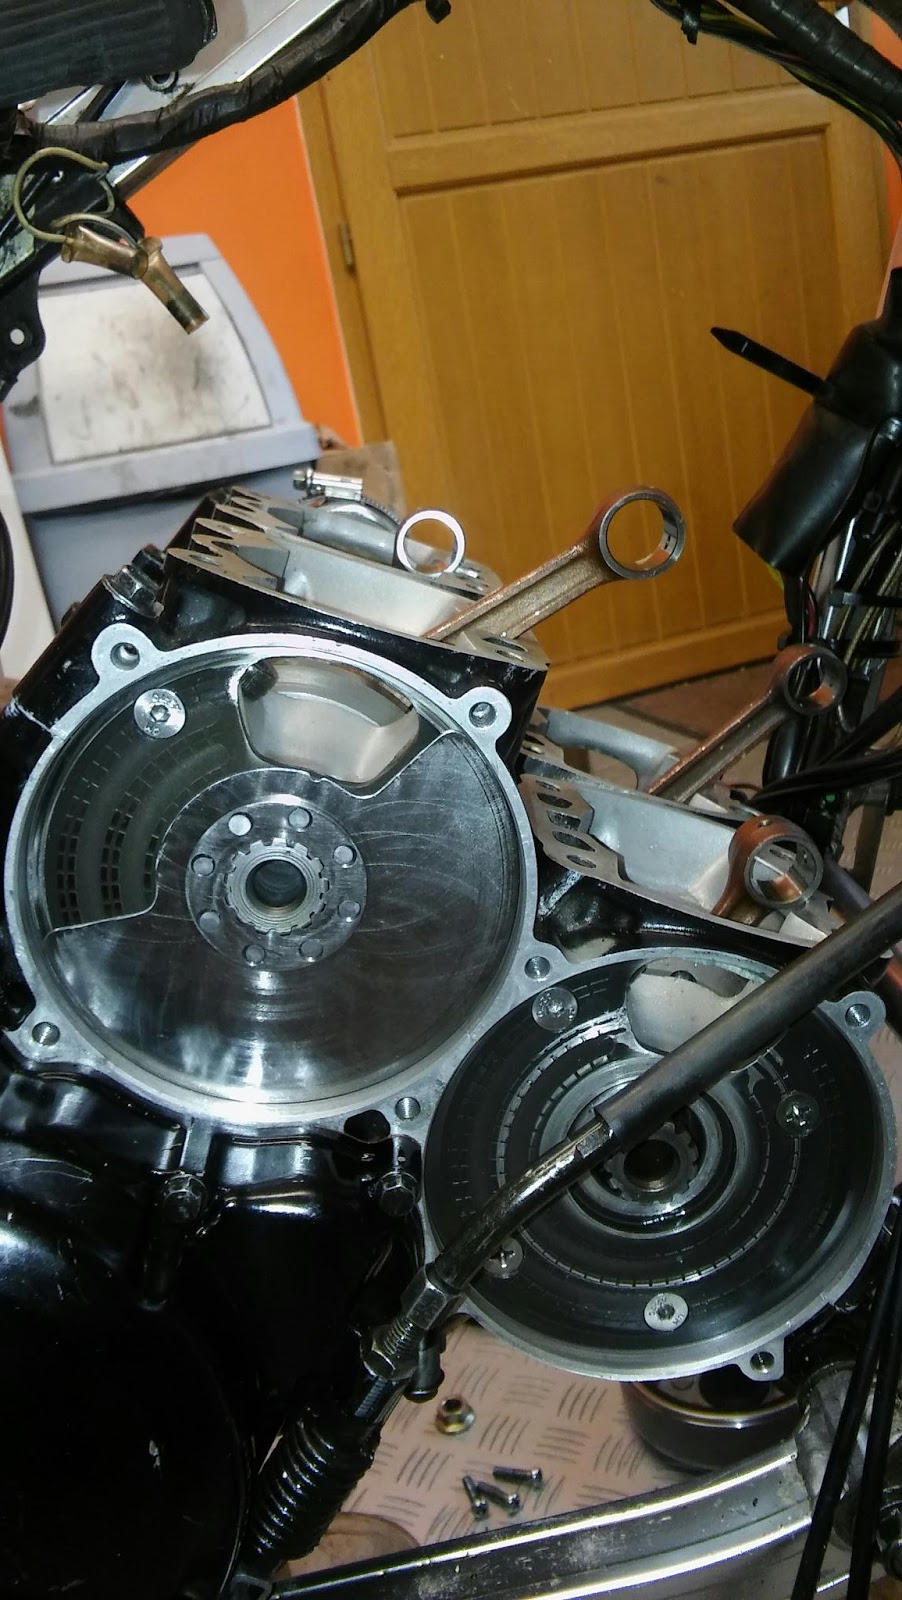
So not really that far advanced in my thinking. I did go to the effort of reinstalling the rear crank and then fitting the rotary disk (on Nr. 4) to see if I could see any clearance issues. as there was some evidence of wear on the rear of the internal rotary disk. But again nothing obvious, plenty of clearance between the internal disk cover and the crank bearing.
Plus clearance between the disk and the outer and inner covers. One thing I will do is check that the crank has been put together correctly. The pistons 2 and 3 should be at TDC whilst 1 & 4 should be at BDC, and cylinder Nr3 should be a couple of degrees before the timing cutout in the crank.....

I have also ordered a belly pan and race seat for the FZR600, I was talking to a guy from BB plastics in the UK, but in the end I went for Poly26 locally as the transport from the UK was a bit expensive and a worry. The disadvantage is that Poly26 only do stuff in that horrible grey, and BB plastics would have done a nice black gel coat for some extra money, which would have made painting less of a problem.

Anyway I have applied for my 2016 racing license (training only) and signed up for the Sunday Ride Classic at the famous Paul Ricard circuit on the 16/17th April, so if anyone is down that way....

Happy Xmas, to all!


Monday, 30 November 2015

RG 500 stripdown

So if you remember, the last outing on the RG ended with what I thought a small seize at the end of the straight at Ales.

Well I was kinda putting off, stripping it down (for fear of what I would find), but over this last week, finally got down to it. To be honest, I was considering just selling up, as the lack of reliability this year, has been a disaster.

Well it didn't dissappoint, I could see with just the head off that something had been bouncing around in there, with impacts on the head. After pulling the cylinder, I found a part of  a thrust washer sitting on the inside of the crankcase, about two thirds of it. The other third had wreaked havoc around the the piston, cylinder and crankcase.

The piston  has a slice taken out of it, and unfortunately the cylinder aswell, from the central transfer port down about 1 cm. Difficult to see on the photos but here they are anyway :-
The cylinder is basically toast... although will now need to investigate a new sleeve, which holds it's own complications as that would that cylinder back to the standard bore whilst the others are all 1.5mms bigger.... maybe need to re-sleeve all....
To add insult to injury, the piece of washer had also tried to escape through the rotary disk, so that needs changing as well!
I continued to strip the engine down, and although there are some impact marks on the conrod, I don't think there is any damage to the bearings... although I will need to get it checked professionally, as the last thing I want to do is have it go again. 
The cylinder head is going to have to be OK, after some filing down of the impacts.
I have decided that I will build it back up and not part it out, but I will not run it again until I get airboxes built, although none of these break downs are due to stuff getting in from outside.
I now think the reason that the thrust washers keep breaking, are that there is not enough clearance between the piston webbing and the thrust washers.
I measured the failed piston gap between piston webbing and it was machined to 21.9mms. The gap on a standard piston is 22.2mms, so missing 0.3mms of clearance. If you remember I had to open out the clearance on 3 of the pistons that ALCO did as they not machined straight - well this was the only piston I did NOT touch, and I think that was the reason for the failure.
The clearance of the other pistons (that I machined) is larger than the standard Suzuki clearance, I am pretty convinced that having a slightly bigger clearance is better, as long as (of course) the conrod can not move to touch the crank webbing.
Anyway sorry to be so wordy..... the bench is very busy....

Saturday, 21 November 2015

New shock for the FZR

Went for what is now the cheapest after market shock on the market, and by no means the worst, if his reputation is to be believed. 395 Euros delivered, and received within 48 hours! Of course changing the shock is a pain, coz you have to support the bike frame rather than just the swinging arm, so you either need to use a jack on the exhaust headers (don't like this method) or prop the bike frame rails with blocks of wood. Mike at the Shock Factory suggested I take a longer shock to give the rear end a bit more lift as it will predominantly be used on the track.

Anyway got the old one out, which was actually in pretty good nick (at least it was clean), ,then started putting the new one in, it's a much bigger beast, the spring is much bigger, but it went in easilt enough, except half way through the bike fell off it's blocks of wood. Thankfully Libby was just a phone call away, and we got it back up on the blocks!

Also installed the remaining rear steel braided brake lines on the RG and RD.

Tuesday, 17 November 2015

First engine start

I thought it was worth starting the engine before investing any money in the track FZR, so I swapped over the battery on the road version, and tried the started motor, which didn't do much, some troubleshooting later revealed that the starter motor relay was not functioning plus there is another relay box which seems to control a number of other circuit also had a broken pin, luckily I had both bits in my parts stash, so they were quickly exchanged, and the starter worked... the engine didn't start first off. I knew there was 12 volts at the coils, so suspected either the pickup or the CDI box, I cleaned up the connectors on the CDI, and removed a plug to test for a spark.

With the plug out a lovely big spark was seen! I put the plug back in and low and behold there was life!

Although the exhaust is pretty quiet the induction noise without the airbox is quite loud. Now I know it works, I will balance the carbs and try and get her running smoothly! I cheated on the video as this was the second start :-)

Monday, 2 November 2015

Garage floor

Finally got some time to cover the flaky paint flooring in the garage, that meant everything out and then a good opportunity to clean out everything and make some more space.